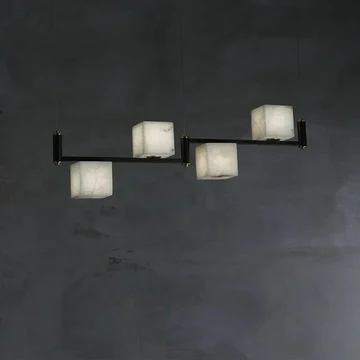
Updating your home's lighting can instantly transform the ambiance and enhance the overall aesthetic. Whether you're looking to upgrade an outdated fixture or simply desire a fresh, new look, changing a ceiling light can be a rewarding DIY project. This comprehensive guide will walk you through the step-by-step process of replacing a ceiling light fixture. We'll cover the necessary tools, safety precautions, and expert tips for a successful installation.
Essential Tools and Materials Needed for Light Fixture Replacement
Replacing a ceiling light fixture needs the right tools and safety gear. This ensures a job well done and safely. Whether you're experienced or new to DIY, the right electrical tools and safety gear are crucial.
Basic Hand Tools Required
- Screwdrivers (flat-head and Phillips-head)
- Wire strippers
- Pliers (needle-nose and lineman's)
- Utility knife
- Measuring tape
Safety Equipment Checklist
- Safety glasses
- Gloves (insulated and cut-resistant)
- Voltage tester
- Ladder or step stool
Optional Specialized Tools
While basic tools and safety gear are key, some specialized tools can help too:
- Cordless drill with assorted drill bits
- Electrical tape
- Nut drivers
- Cable cutters
Having the right electrical tools and safety gear prepares you for the task. Always remember, your safety is the most important thing when working with electricity.
Safety Precautions Before Starting the Project
Before starting your light fixture replacement, electrical safety is key. Taking the right steps can prevent dangers and make the project go smoothly. Let's look at the important steps to take before you start.
First, make sure to disconnect the power at the circuit breaker. This step is vital to avoid electric shock. Find the right circuit breaker and switch it off. Then, check that the power to the light fixture is off.
- Locate the circuit breaker panel and identify the specific breaker that controls the light fixture you'll be working on.
- Switch the breaker to the "off" position to completely shut off the power.
- Test the light switch to ensure the power is truly disconnected.
Next, get the right safety equipment. You'll need a strong ladder and protective gear like safety glasses and gloves. Using a ladder safely is crucial to avoid falls and injuries.
"Taking the time to disconnect the power and use the right safety equipment can make all the difference in a successful light fixture replacement project."
By following these safety steps, you're on your way to a safe and successful project. Always remember, electrical safety is the most important thing when working with power shutoff and circuit breakers.
How to Change a Ceiling Light Fixture
Changing your home's lighting can be a fun DIY project. It involves removing the old fixture, checking the electrical box, and putting in the new mounting bracket. By following these steps, you can make your space look and work better with a new light fixture.
Removing the Old Fixture
First, turn off the power to the light at the circuit breaker. Then, carefully take out the old light fixture. Note how it was wired and mounted for your new fixture. Be careful with the old fixture as it might have delicate parts or sharp edges.
Examining the Electrical Box
After removing the old fixture, inspect the electrical box. Make sure the box is well-attached and the wiring is good. If you find any problems, fix them before installing the new fixture. This ensures a safe and lasting electrical connection.
Installing the Mounting Bracket
Next, install the new mounting bracket for the new light fixture. Follow the manufacturer's instructions to secure the bracket to the electrical box. This step is crucial for a stable and secure installation, allowing you to safely attach the new fixture.
By carefully following these steps, you can replace your old ceiling light fixture with a new one. This will improve your space's look and function. Always prioritize safety and seek professional help if you're unsure or have concerns during the process.
Understanding Your Home's Electrical Wiring
Learning about your home's electrical wiring is key to changing a ceiling light fixture. Knowing the basics helps you install it safely and with confidence.
First, let's talk about the electrical wiring basics. Homes have three main wire colors: black for hot wires, white for neutral wires, and green or bare copper for ground wires. It's crucial to identify these wires correctly to avoid dangers.
Next, we have circuit mapping. Knowing which circuit your light is on helps find the power source. It also helps solve any problems during installation.
| Wire Color | Purpose |
|---|---|
| Black | Hot wire |
| White | Neutral wire |
| Green or Bare Copper | Ground wire |
Grasping the electrical wiring concepts for light fixture installation boosts your confidence. It ensures your project is a success.
Proper Wire Connection Techniques
Ensuring proper wire connections is key for your new light fixture's safety and reliability. Let's dive into the essential techniques for a smooth installation.
Color Coding and Wire Matching
Electrical wiring in your home uses a standard color-coding system. It's vital to match the wires correctly for safety and function. You'll usually find:
- Black or hot wire - carries the electrical current
- White or neutral wire - completes the circuit
- Green or bare copper wire - the ground wire, responsible for safety
Wire Nut Installation Tips
Wire nuts connect the wires. Here are some tips for a secure installation:
- Strip the wire ends evenly, exposing about 3/4 inch of bare copper
- Twist the wires together clockwise before securing the wire nut
- Ensure the wire nut is tight enough to prevent any loose connections
Ground Wire Connection
The ground wire, often green or bare copper, is crucial for safety. It ensures electrical current has a safe path, protecting you and your home. Securely attach the ground wire to the designated grounding terminal or screw in the electrical box.
Mastering these wire connection techniques ensures your new light fixture is installed safely. Take the time to understand these procedures. Your home will shine with reliable, worry-free illumination.
Mounting the New Light Fixture
Now that the electrical connections are set, it's time to install the new light fixture. It's important to center it properly and ensure it's stable. This will make your space look good and work well.
Start by lining up the mounting bracket with the electrical box. Make sure it's level and in the right spot. This step is key to getting the fixture to look straight and nice once it's up.
- Attach the mounting bracket to the electrical box with the screws and hardware given.
- Lift the light fixture carefully, spreading the weight evenly as you place it on the bracket.
- Secure the fixture with the screws or rods provided, making sure it's strong and steady.
"The key to a successful light fixture installation is getting the mounting and centering just right. Take your time and double-check the alignment for a flawless final result."
With the fixture mounted, you're almost there. You'll soon enjoy better lighting and a fresh look in your space. Remember, proper fixture installation, centering techniques, and weight distribution are key for a lasting, safe, and beautiful light fixture.
Testing Your New Installation
After installing your new light fixture, it's time to test it. Testing and troubleshooting help make sure it's safe and works right. Let's look at the important steps to check your light fixture's installation.
Initial Power Test
First, turn the power back on and switch on the light. Make sure it lights up as it should. If it doesn't, check your wiring and follow the manufacturer's guide for help.
Checking for Stability
Look at the light fixture to see if it's steady and doesn't move a lot. If it's loose, tighten screws or connections. A stable fixture is key for safety and lasting use.
Troubleshooting Common Issues
If you find problems like flickering, buzzing, or not turning on, don't worry. Most issues can be fixed with electrical troubleshooting. Check your wiring, connections, and the circuit breaker.
If you're not sure about light fixture testing or installation verification, get help from a licensed electrician. They can find and fix problems, making sure your light is installed right and safe.
"Proper testing and troubleshooting are essential for a successful light fixture installation. Take the time to ensure everything is working correctly and safely."
Maintenance Tips for Your New Light Fixture
Congratulations on your new light fixture! To keep it in top shape, follow these key maintenance tips. Always replace bulbs with the right wattage and type for the best results. When cleaning, use a soft, dry cloth to wipe away dust or smudges.
Avoid harsh chemicals or abrasive cleaners, as they can harm the finish. For a deeper clean, a damp cloth is okay, but be careful around electrical parts. Check the fixture often for loose connections or wear. Tightening screws or replacing parts can make it last longer.
Always put safety first when caring for your light fixture. Make sure the power is off and the fixture is cool before you start. By following these easy tips, your new light fixture will stay bright and beautiful for years.
FAQ
What tools and materials are needed to change a ceiling light fixture?
To change a ceiling light fixture, you'll need basic tools like a screwdriver, pliers, and wire strippers. Safety gear such as gloves and a ladder is also essential. A voltage tester can be helpful too.
What safety precautions should be taken before starting the light fixture replacement project?
First, turn off the power at the circuit breaker. Make sure the area is well-lit. Use a sturdy ladder for safe access to the ceiling. Always wear protective gear like gloves and safety glasses.
How do I properly remove the old ceiling light fixture?
Start by disconnecting the wires and unscrewing the mounting screws. Carefully lower the fixture down. Check the electrical box to make sure it's in good shape before installing the new fixture.
What are the key steps for installing the new ceiling light fixture?
Mount the new electrical box or bracket first. Then, connect the wires by their color coding. Securely attach the fixture to the ceiling. Make sure to install wire nuts correctly and connect the ground wire safely.
How do I test the new light fixture to ensure it's working properly?
After installing, test the fixture to see if it's getting power. Check if the fixture is stable. Troubleshoot any problems like flickering or lights not working.
What maintenance tips should I follow to keep my new ceiling light fixture in good condition?
Clean the fixture regularly and replace any burnt-out bulbs. Check the wiring and connections for any issues. Follow the manufacturer's care and upkeep recommendations to extend your light's life.


