Adding a stunning chandelier to your living space can really enhance the look and feel. It's a great way to update your decor or add elegance to a new area. Installing a chandelier might seem hard, but with the right tools and some guidance, it's easy and fun. This guide will show you how to do it, from getting ready to the final touches.
Make sure the power is off, connect the chandelier's wires to the power cord, then hang the chandelier with the fixture, and finally turn on the power to test it.
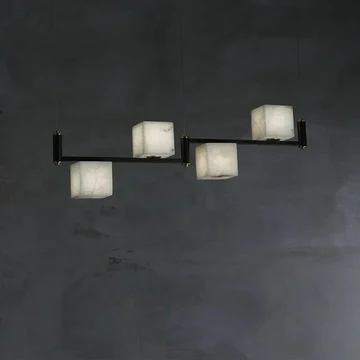
Get ready to light up your room with a beautiful new chandelier. It will match your decor perfectly.
Key Takeaways
- Gather the necessary tools and materials to ensure a smooth installation process.
- Prioritize safety by turning off the power supply and following proper electrical wiring procedures.
- Carefully mount the chandelier's mounting bracket and junction box for a secure and stable installation.
- Connect the electrical wiring according to the manufacturer's instructions for safe and reliable operation.
- Adjust the chandelier's level and balance to achieve the desired aesthetic and functionality.
Introduction: Elevating Your Space with a Stunning Chandelier
Chandeliers add elegance to any room, changing the look and feel of your home. Installing a new chandelier can change your space's style. This guide will help you install a chandelier like a pro.
Looking to add style to your living room or dining area? The right chandelier lighting can make a big difference. Choose a chandelier decor that fits your home's style to enhance its look.
"A chandelier is not just a light fixture; it's a work of art that can transform the entire atmosphere of a room." - Interior Design Specialist
We'll show you how to install a chandelier step by step. This way, your new light fixture will look great and work well. Get ready to make your space look amazing.
Preparing for Installation: Essential Tools and Materials
Before starting your chandelier installation, make sure you have all the right chandelier installation tools and chandelier installation supplies. This careful preparation will help you avoid any hitches and keep you safe during the process.
Gathering the Right Equipment
You'll need a solid toolkit to feel confident about this project. Begin with the basics like a power drill, screwdrivers, wire strippers, and a ladder. Also, get wire nuts, electrical tape, and a voltage tester for the electrical work.
- Power drill
- Screwdrivers (flathead and Phillips head)
- Wire strippers
- Ladder
- Wire nuts
- Electrical tape
- Voltage tester
Safety First: Precautions and Guidelines
When installing a chandelier, safety is paramount. Make sure the power is off before starting. Wear safety glasses and gloves, and follow all local building codes and electrical rules.
"Proper preparation and safety measures are the keys to a successful chandelier installation. Rushing through the process or neglecting essential precautions can lead to disastrous consequences."
By taking the time to get the right tools and materials, and focusing on safety, you'll be ready to add a beautiful chandelier to your space.
Step-by-Step Guide: Installing the Chandelier
Installing a chandelier can transform your space. It's important to do it carefully and precisely. This guide will help you through the key steps for a smooth chandelier installation.
Turning Off the Power Supply
When installing a chandelier, safety comes first. Find the circuit breaker or light switch for the power. Turn it off to avoid any electrical risks.
Removing the Old Light Fixture
After turning off the power, remove the old light fixture. Disconnect the wires and unscrew the mounting bracket. Lower the fixture carefully and set it aside without damaging it.
- Find the circuit breaker or light switch for the power.
- Turn off the power to the fixture.
- Disconnect the wires from the old light fixture.
- Unscrew the mounting bracket or base and lower the fixture carefully.
With the power off and the old fixture removed, you're ready for the next step. Now, you can start installing the new chandelier.
Attaching the Mounting Bracket and Junction Box
Securing the mounting bracket and junction box is key in installing a chandelier. These parts give your light fixture a strong base and ensure a safe electrical connection. Let's look at how to attach these important parts correctly.
Mounting the Bracket
First, find the electrical junction box in your ceiling. This is where the chandelier's wires will connect. Make sure the junction box is well-attached to the ceiling framing. If it's not, use anchors or screws to make it stable.
Then, put the mounting bracket over the junction box, making sure the holes line up. Use the screws provided to attach the bracket to the junction box. Check that the bracket is level and in the middle so your chandelier hangs straight.
Connecting the Junction Box
Now, attach the chandelier junction box. This box holds the electrical connections and keeps the wiring safe. Follow the manufacturer's guide to attach the junction box to the mounting bracket.
Make sure the chandelier mounting bracket and junction box are securely attached before moving on. This step is essential for a safe and successful lighting installation.
"Proper installation of the mounting bracket and junction box is crucial for the overall stability and safety of your new chandelier."
Wiring the Chandelier: Connecting the Electrical Components
Connecting your chandelier's electrical parts is key. It needs careful attention and safety. We'll show you how to understand the wiring diagram and make safe connections. This ensures your chandelier works right.
Understanding the Wiring Diagram
Before starting chandelier wiring, get to know the wiring diagram. It shows the electrical links needed for your chandelier. Take time to study it well. This makes the installation smooth.
- Learn the wire colors and their roles, like hot, neutral, and ground.
- See how the chandelier wires connect to the junction box wires.
- Make sure you get the chandelier electrical connections before you start.
Secure Connections for Safe Operation
After you know the wiring diagram, start making connections. Chandelier safety is crucial here. So, be careful to install safely.
- Twist the matching wire colors together with wire connectors.
- Check that all connections are tight and safe, with no loose wires.
- Double-check your work for safe connections and no hazards.
By following these steps and understanding the wiring diagram, you're on the right path. Always put safety first and take your time for a top-notch job.
Securing the Chandelier to the Mounting Bracket
Now that the electrical wiring is done, it's time to attach the chandelier to the mounting bracket. This step is crucial for a safe and sturdy installation. It also boosts the beauty of your space. Here's how to hang the chandelier correctly and finish the chandelier installation.
- Start by lifting the chandelier and aligning it with the bracket. Make sure it's centered and level, adjusting if needed.
- Find the screws or fasteners in your chandelier kit. Put the screws through the holes in the bracket to hold the fixture.
- Tighten the screws slowly and evenly. Check for a good fit. Don't over-tighten to avoid damage.
- After securing the chandelier, check if it's level and centered. Adjust if necessary for a beautiful chandelier hanging.
By following these steps, you can confidently mount the chandelier and enjoy a stunning centerpiece in your room. Always prioritize safety when working with electrical and heavy objects.
| Task | Description |
|---|---|
| Align Chandelier | Carefully position the chandelier on the mounting bracket, ensuring it is centered and level. |
| Secure Chandelier | Thread the provided fasteners or screws through the pre-drilled holes in the mounting bracket to securely attach the chandelier. |
| Tighten Fasteners | Gradually and evenly tighten the screws, avoiding over-tightening to prevent damage. |
| Final Inspection | Ensure the chandelier is level and centered, making any necessary adjustments for a visually appealing chandelier hanging. |
By following these steps, you can successfully secure the chandelier to the mounting bracket and complete the chandelier installation process.
How to Install a Chandelier: Fine-tuning and Adjustments
The final steps in the installation process involve fine-tuning and adjustments. This ensures your new chandelier is perfectly level, balanced, and ready for use. We will cover how to level the fixture, install the appropriate light bulbs, and add any decorative shades or accessories.
Leveling and Balancing the Fixture
Once the chandelier is securely mounted, it's time to ensure it's perfectly level and balanced. This step is crucial for achieving a polished, professional look. Begin by using a level to check the alignment of the fixture. If adjustments are needed, gently shift the chandelier until it is perfectly level.
To balance the chandelier, examine the fixture for any uneven distribution of weight. If one side appears heavier, try adjusting the length of the suspension rods or chains on that side to even out the balance. This step may require some trial and error, but the result will be a beautifully centered and poised chandelier.
Installing Light Bulbs and Shades
With the chandelier leveled and balanced, it's time to complete the installation by adding the finishing touches. Start by installing the appropriate light bulbs, ensuring they match the wattage and type specified by the manufacturer. This will not only ensure optimal performance but also protect the electrical components.
- Choose energy-efficient LED or halogen bulbs for a modern, eco-friendly solution.
- Ensure the bulbs are the correct size and shape to fit the chandelier's sockets.
- Consider the desired lighting effect and select bulbs with a warm or cool color temperature.
Finally, add any decorative shades or crystals to the chandelier, following the manufacturer's instructions. These elements can significantly enhance the overall aesthetic and create a stunning focal point in your space.
By meticulously leveling, balancing, and accessorizing your new chandelier, you'll be able to enjoy a beautifully installed and functional lighting fixture. It will elevate the ambiance of your room.
Restoring Power and Testing the Installation
After installing your new chandelier, the last step is to turn on the power. This step makes sure the fixture works right and is safe. It also helps your lighting last longer.
Turning the Power Back On
First, make sure all electrical connections are tight. Then, find the circuit breaker for the lights. Switch it on to power up the chandelier. Now, you can test if it's working.
Comprehensive Chandelier Testing
With power on, check your chandelier carefully. Here's how to make sure it's installed right and safe:
- Look over the chandelier: Check for any loose parts, tilting, or other problems.
- Chandelier installation testing: Turn it on and off a few times. This checks if it works and the switch is good.
- Chandelier power connection: Make sure the electrical connections are tight. Look for any overheating or sparks.
- Chandelier safety check: Make sure it's well attached to the ceiling. Check for any loose or hanging wires.
If you find any problems, fix them right away. This ensures your chandelier is safe and works well.
| Inspection Point | Verification |
|---|---|
| Electrical Connections | Secure and no signs of overheating |
| Chandelier Mounting | Securely attached to the ceiling |
| Chandelier Operation | Turns on and off properly |
| Overall Appearance | No loose or tilting components |
By following these steps, you can be sure your new chandelier is installed right. It will make your space look great for many years.
Maintaining Your Chandelier: Tips for Longevity
To keep your chandelier shining for years, it's key to have a good maintenance plan. Follow these easy tips to keep your chandelier looking great and working well for a long time.
Cleaning your chandelier regularly is a must to keep it shiny. Use a soft, lint-free cloth to wipe the metal and glass parts. For a deeper clean, a mild glass cleaner and a soft microfiber cloth can make it sparkle again.
It's also important to dust your chandelier often to stop dirt and grime buildup. Use a feather duster or a soft-bristled brush to gently sweep away dust from the details. This simple step will help your chandelier stay in top condition.
FAQ
What tools and materials do I need to install a chandelier?
To install a chandelier, you'll need a few tools and materials. You'll need a screwdriver, wire cutters, pliers, and a voltage tester. Also, electrical tape, wire nuts, and a ladder or step stool are necessary. Don't forget safety gear like gloves and safety glasses.
How do I turn off the power supply before starting the installation?
First, find the circuit breaker for the light fixture and turn it off. It's smart to test the power with a voltage tester to make sure it's off.
How do I remove the old light fixture?
To remove the old fixture, unscrew the mounting screws or nuts. Then, disconnect the wires, noting their positions. Once disconnected, you can lower and set aside the fixture.
How do I attach the mounting bracket and junction box?
Attach the mounting bracket and junction box to the electrical box in the ceiling. Use the provided hardware to mount them, ensuring they're level and support the chandelier's weight.
How do I wire the chandelier to the electrical components?
Use the wiring diagram to connect the live, neutral, and ground wires. Secure the connections with wire nuts and make sure all wires are tucked into the junction box.
How do I hang the chandelier and adjust it for proper alignment?
Lift the chandelier and hook it onto the mounting bracket. Secure it with the provided hardware. Adjust the fixture to ensure it's level and balanced.
How do I install the light bulbs and shades?
Follow the manufacturer's instructions to install the light bulbs and shades. Make sure the bulbs fit the chandelier correctly.
How do I test the installation and restore power?
After installing, turn the circuit breaker back on and test the chandelier. Check for any issues with the lighting.
What tips can I follow to maintain my chandelier?
To keep your chandelier in good shape, regularly dust and clean it. Replace burnt-out bulbs and check for damage. Avoid harsh chemicals and turn off the power before maintenance.